Digital X-Ray Camera DXr1
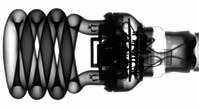
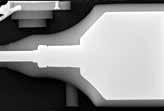
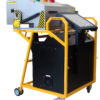
Global Marine present the first digital submarine cable X-ray Camera, DXr1, developed in conjunction with leading UK Radiography company, JME. This state-ofthe-art camera will supersede the Type 13 cameras and eliminate film technology & wet chemical processing. The light bulb x-ray illustrates the clarity, detail & flexibility of radiographs obtained from the DXr1 camera.
Digital X-Ray and Assessment Development for Subsea Cable Jointing
The DXr1 is the successor to the Type 13 Mk III X-Ray Camera for submarine cable use and has the same rugged marine construction and radiation safety. As the camera is fully digital, system repair time is reduced by eliminating the film processing stage and allowing image assessment to commence as soon as the first image is available. The digital images can be stored in a dedicated folder on the vessel server and therefore immediately available for the assessor to assess them with special software, incorporating a range of drop-down tools such as wall-thickness and inclusion gauges. Image defects can be marked-up and stored together with comments. When all images have been assessed, a summary sheet is produced giving an overall result for the joint. The advanced software contains noise reduction features, brightness/contrast adjustment and identifies 16,000 levels of greyscale.
- Windows Compatible
- Rugged Marine Construction
- Highest Radiography Safety
- Power: 96-240v 5A 50/60 Hz
- No Chemical Processing
- No X-ray Films Required
- No Lightbox or Graticules
- No hard-copy film archiving
- Higher image definition
- System repair time reduced
- Images can be emailed
- Software Image Assessment
- Touch-screen Control
- Image Enhancement Software
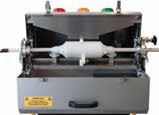
Load joint into cabinet
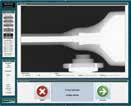
Collect first image
Rotate cabinet and collect rest of images

Radiographer image viewer screen

Final report generated

Image being assessed
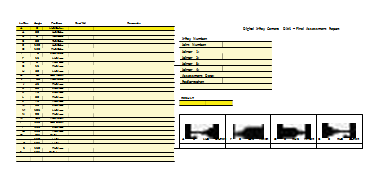
Assessor Software image selection table

Images accepted by radiographer and sent to server
DXR1 Technical Specification
| Dimension/Mechanical | |
|---|---|
| Height | 127cm |
| Width | 90cm |
| Length | 110cm |
| Weight | 155kg |
| Manoeuvrability | 2 fixed castors, 2 free castors, Indicated lifting points, Lashing points provided |
| Power Requirements | |
|---|---|
| Voltage | 96-240V AC @ 50/60Hz |
| Power | 1. 2kW maximum |
| Supported Cable Sizes (using appropriate collets) | |
|---|---|
| Maximum | 90mm diameter |
| Supported Joint Sizes | |
|---|---|
| Maximum | 101mm diameter |
| Dimension/Mechanical | |
|---|---|
| Type | Bespoke mono-block x-ray tube |
| Max tube voltage | 50kV |
| Max tube current | 2mA |
| Calibration | kV and mA settings optimized for polyethylene inspection |
| Detector | |
|---|---|
| Technology | CMOS |
| Resolution | 3072 x 1944 |
| Bit depth | 14-bits per pixel (up to 16,383 grey scale levels) |
| Pixel pinch | 75µm |
| Image area | 145mm x 230mm |
| Image quality | |
|---|---|
| Sensitivity | Better than 3% |
| Un-sharpness | 0.16 |
| Positioning | |
|---|---|
| X-Ray source | Fully adjustable across width of cabinet, computer-controlled, motorized, 0.1mm accuracy |
| Imaging panel | Fully adjustable across width of cabinet, computer-controlled, motorized, 0.1mm accuracy |
| Joint | Guide-plate ensures user loads joint in correct position |
| Cabinet rotation | Manual operation with rotation lock and angle indication, Computer interface indicates required position, 0 to 165 degrees range of movement, Additional locking fastener at 0 degree position for storage and transportation |
| Imaging | |
|---|---|
| Quality indication | Bespoke IQI’s installed in cabinet appear on each image |
| Image correction | Automatic dark, gain, and panel defect correction |
| Image enhancement | Multiple-exposure averaging gives highquality low-noise images |
| Image size | Approximately 13MB per image |
| Image data | Embedded tags store detector position, joint serial numbers, job details, etc. |
| Archiving | Images sorted into folders to enable easy retrieval |
| User Interface | |
|---|---|
| Type | Touch-screen, graphical user interface |
| User functions | Step-by-step step guidance through inspection process, on-screen review of previous images, Export image sets to USB drive |
| Supervisor functions | Review and edit joint and cable definitions, add new joint and cable definitions |
| Engineer functions | Perform full system set up and calibration |
| Security | PIN protection option to prevent unauthorized access to settings |
| Safety Features | |
|---|---|
| Visual warnings | 3-aspect coloured light signals (as per UK standards), high visibility markings highlight pinch-points around moving parts |
| Audible warnings | Integrated sounder, active during pre-inspection phase |
| Interlocks sensors | Cable located, correct collets fitted, door closed, access panel secured, light signals operational |
| Emergency stop | ‘Mushroom’ button on control panel suspends all x-ray and motor operations |
| Access control | Key switch to enable x-ray operation, lockable power switch |
| Shielding | Radiation levels less than 2.5µSvh-1 at 50mm from all surfaces of x-ray cabinet |
| Image Inspection | |
|---|---|
| Full image inspection software package available | |
| Advanced image enhancements | |
| Defect and wall-thickness measurement tools | |
| Image annotation | |
| Report generation | |
| Inspection software to be located on a PC elsewhere. | |


